Camera
Cameras are essential in robotics and computer vision applications for tasks such as object detection, localization, and motion planning. In this tutorial, we will explore how to set up cameras in Jacobi Studio, understand the Camera and Intrinsics classes, and learn how to integrate camera data into your applications. We will first cover the basics of camera classes and then demonstrate the two ways of working with cameras; specifying them in code and specifying them in Jacobi Studio.
Overview of Camera Classes
The Intrinsics class represents the intrinsic parameters of a camera, which include:
Focal Lengths (
focal_length_x,focal_length_y): The focal lengths along the x and y axes in pixels.Optical Center (
optical_center_x,optical_center_y): The coordinates of the optical center (principal point) in pixels.Image Dimensions (
width,height): The width and height of the image in pixels.
These parameters are crucial for projecting 3D points to 2D image coordinates and vice versa. If you work with a simulated camera, you can specify these parameters directly, while if you work with real hardware, you need to obtain them from the camera calibration process.
The Camera class represents a camera in the environment and includes:
Model Name (
model): The model or type of the camera.Name (
name): A unique identifier for the camera.Origin (
origin): The pose of the camera in the environment.Intrinsics (
intrinsics): AnIntrinsicsobject containing the camera’s intrinsic parameters.
Specifying Cameras in Code
To create the intrinsics object, you can can specify the parameters directly:
from jacobi import Intrinsics

# Create intrinsics with known parameters
intrinsics = Intrinsics(
    focal_length_x=640.0,
    focal_length_y=480.0,
    optical_center_x=320.0,
    optical_center_y=240.0,
    width=640,
    height=480
)
You can create a camera object by providing the model, name, origin, and intrinsics:
from jacobi import Camera, Frame

# Assuming you have an Intrinsics object and a Frame for the camera's pose
camera = Camera(
    model='simulated_camera',
    name='camera_1',
    origin=Frame.identity(),
    intrinsics=intrinsics
)
Cameras in Jacobi Studio
We recommend using Jacobi Studio to visualize camera data such as images, point clouds, or depth maps. However, the vision library and the camera drivers use standard Python types and can be used flexibly in various contexts.
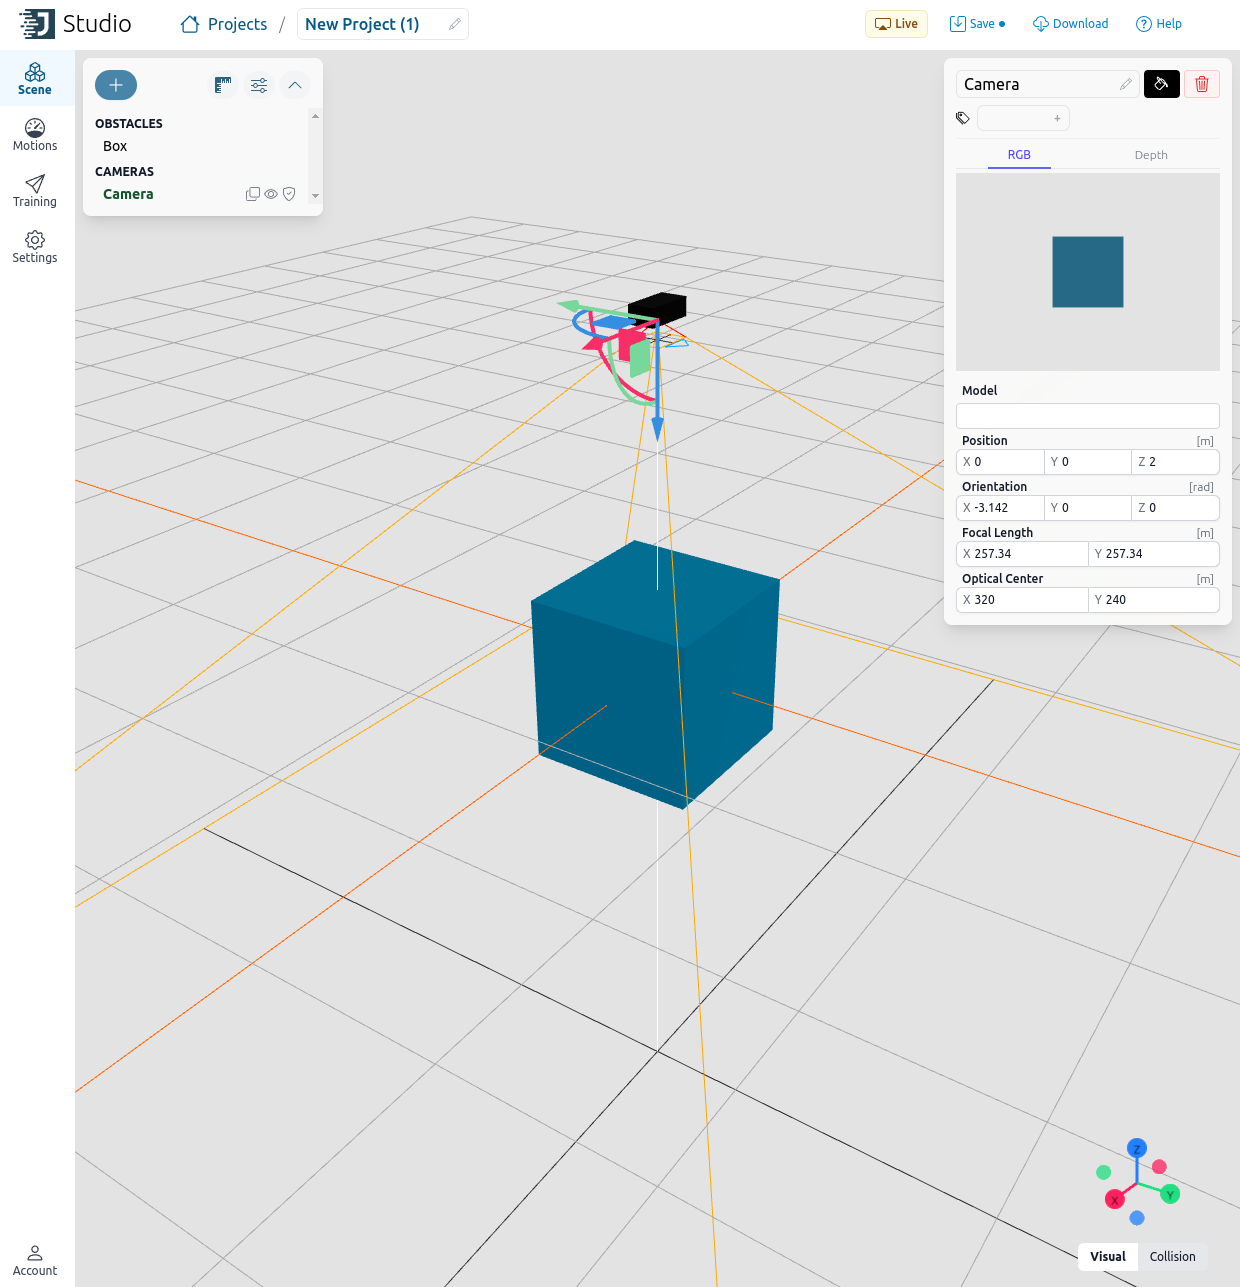
To use the vision library, we first need to place a camera into the environment:
Open a new project in Jacobi Studio.
Click on the
+button to add a new element.Select Camera from the list of elements.
 You can adjust the camera’s parameters using the details panel on the right side of the canvas. This includes setting the camera’s position, orientation, and intrinsic parameters.
Alternatively, you can create a camera from code as described above and then add it using Studio Live. This provides flexibility if you need to set up cameras dynamically or automate the setup process.
from jacobi import Studio
studio = Studio()
studio.add_camera(camera)
Once your project is configured, you can download it and use it within your Python code.
Loading the Studio project
Save your project in Jacobi Studio by clicking the Download button, which will save it as a .jacobi-project file. You can then load the project using the Planner.load_from_project_file method:
from pathlib import Path
from jacobi import Planner

planner = Planner.load_from_project_file(Path('path/to/your_project.jacobi-project'))
camera = planner.environment.get_camera('camera_1')
If you prefer to load the project directly from Jacobi Studio, you can use the Planner.load_from_studio method:
from jacobi import Planner

planner = Planner.load_from_studio()
camera = planner.environment.get_camera('camera_1')
In the next tutorial, we will take a look at different image data types and how to work with them using the Jacobi Vision library.