Studio
Studio is the first part of the Jacobi Motion Platform workflow. Robot Programming begins by defining the environment that the robot is going to be working in. With the Jacobi Platform, the robot environment is defined in Studio.
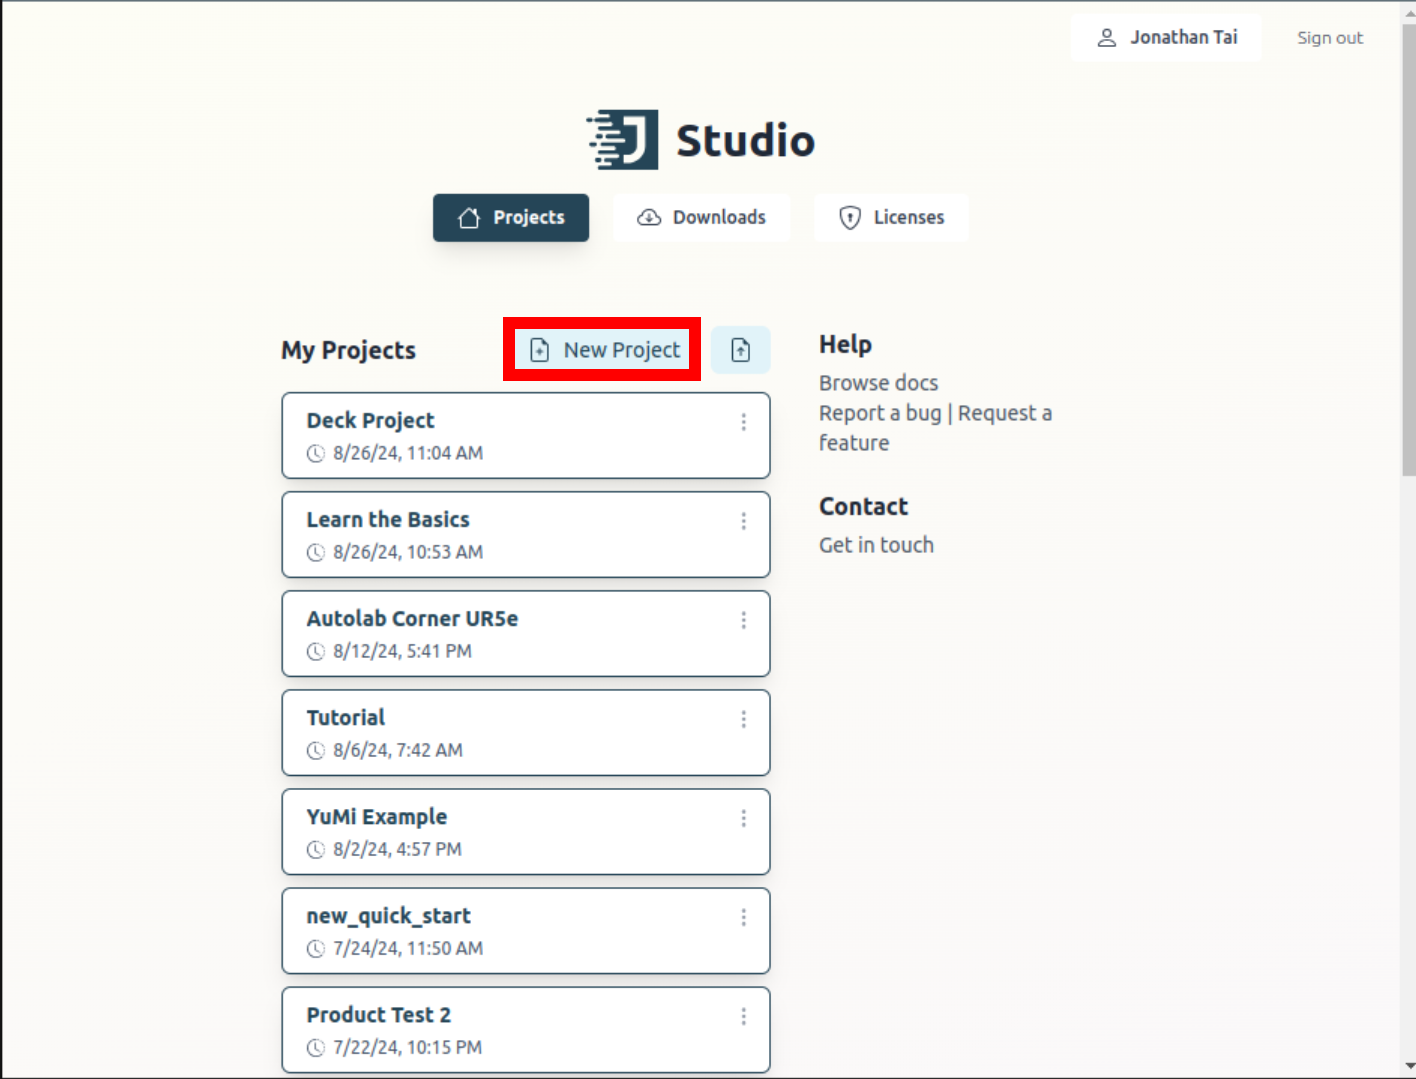
To navigate to studio, go to studio.jacobirobotics.com. The Studio home page is where you can navigate to downloads for the Jacobi Motion LIbrary, your license information, our documentation, as well as report bugs, request features, and get in touch with us.
Click on the New Project button to open a new project.
Studio is a tool to help you set up your environment for programming, it consists of 4 major tabs.
Scene
This is where your 3D canvas lives. It is where you will define all of the components in your robot workcell. Collision geometry, grippers, and end effector obstacles are inserted here when building your robot scene.
This is also where you place waypoints for the robot to go to. Waypoints represent points in space of importance that the robot can reach. These will be used later to generate trajectories both in code as well as in Studio
Motions
This is where you will generate motions to test the validity of your waypoints.
Training
This is where you will train an AI motion planner that generates optimized motions in milliseconds.
Settings
This is where your studio settings live.
Placing Geometry into your Scene
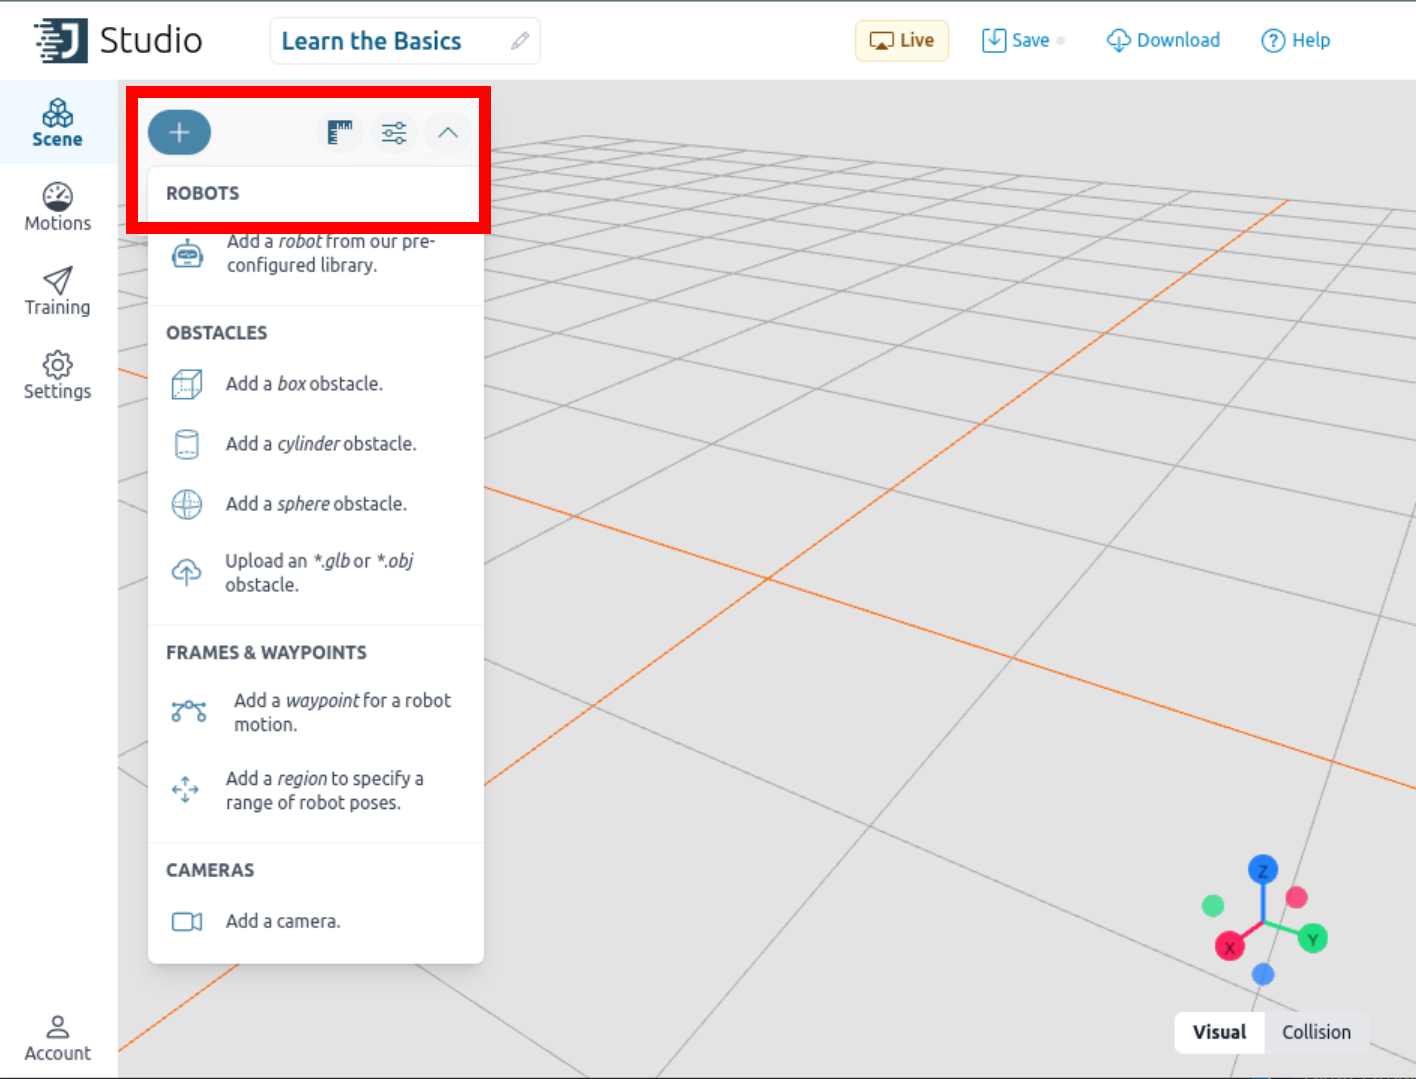
In order to place geometry into your scene, click on the plus at the top of your object tree. This will give you a dropdown of the various kinds of objects that you can add to your scene.
Robots & End Effectors
Jacobi has a growing library of robot models that you can choose from. After picking a robot, it will appear in your scene as follows.

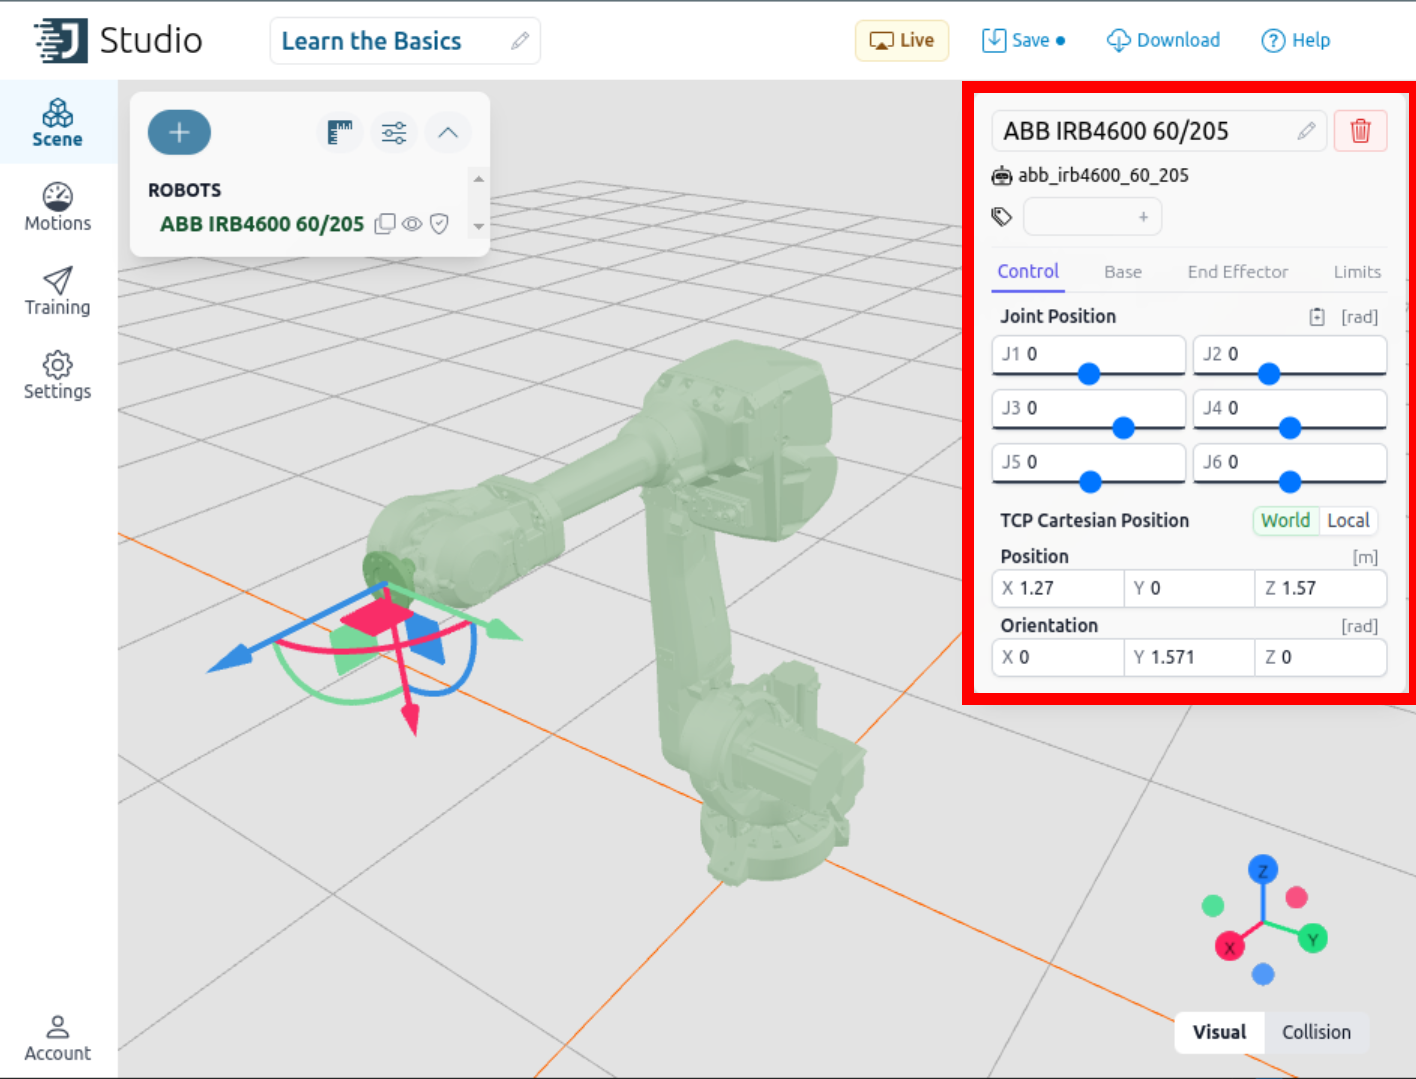
You can adjust the pose of the robot and it’s TCP using the robot’s details panel.
In order to adjust the position of the robot in the scene use, the ‘Base’ tab in the robot details panel. You can also set joint limits for the robot using the Limits tab in the robot details panel.
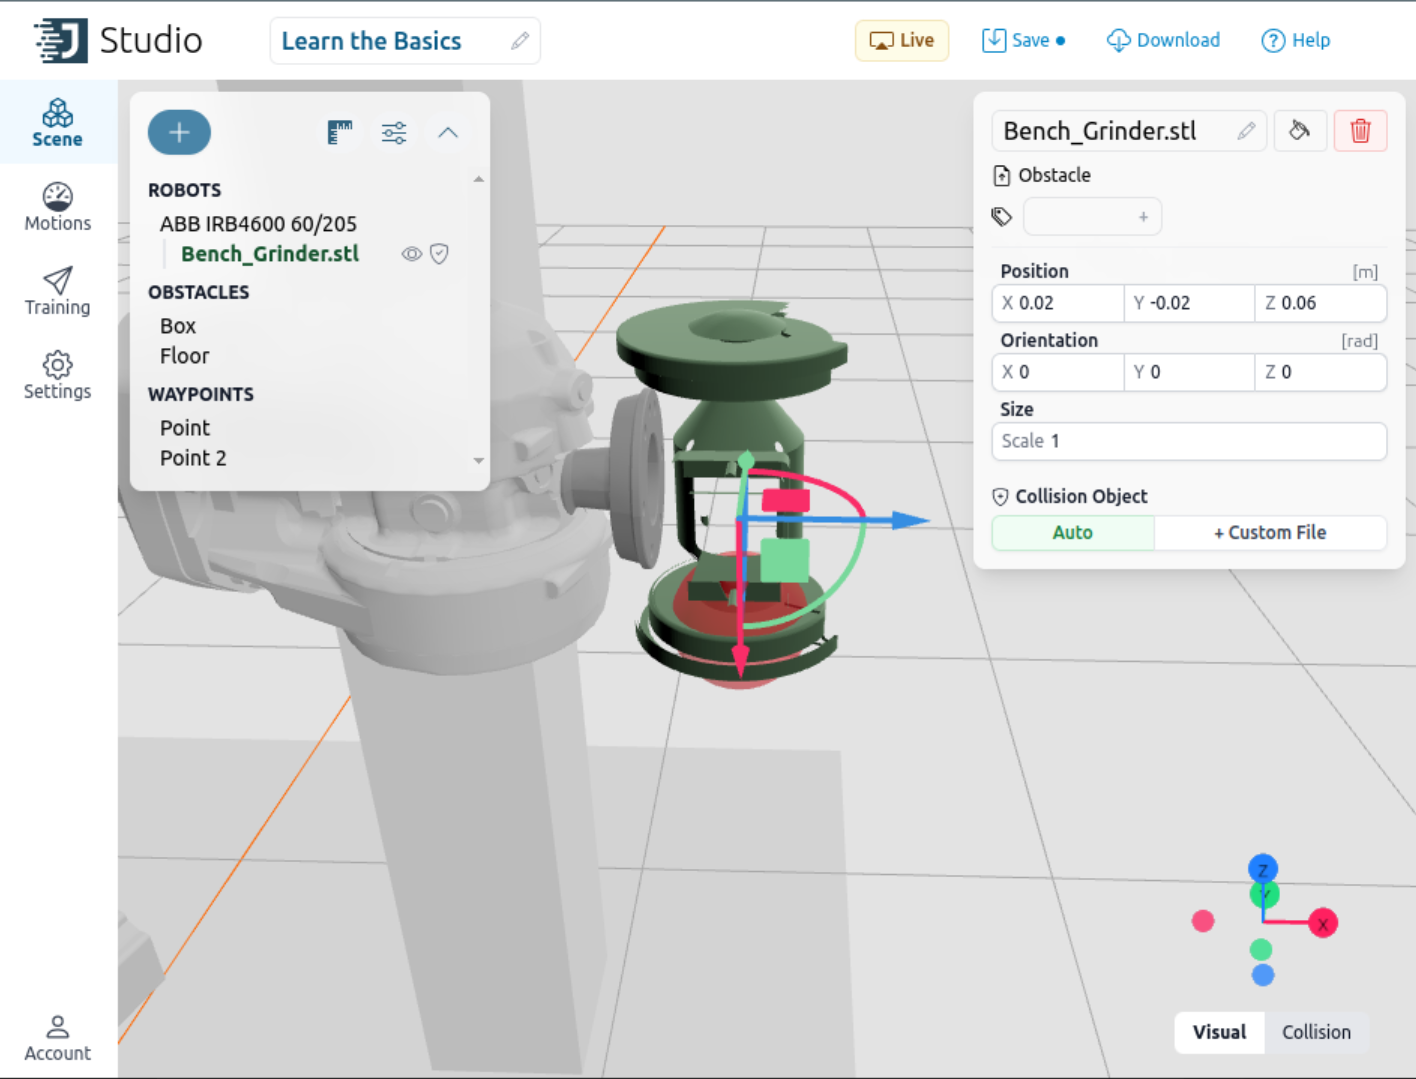
If your robot has an end effector, you can add it to the robot by clicking on the ‘End Effector’ tab in the robot details panel. Here you can add an End Effector by clicking the corresponding ‘Add Obstacle’ button. This will add an Obstacle in the end effector’s position on the robot. Similar to Obstacles you can also add a custom model as an end effector

Tip
💡 when adding end effectors don’t forget to also edit the position and orientation of your end effector so that your robot is not colliding with itself.
If you have added an end effector to the robot you may also add an Item Obstacle. An Item Obstacle is an object that may be attached to the end effector at any given time. Similar to Obstacles you can also add a custom 3D Model as an Item Obstacle, as well as adjust it’s position and orientation relative to the end effector.
Obstacles
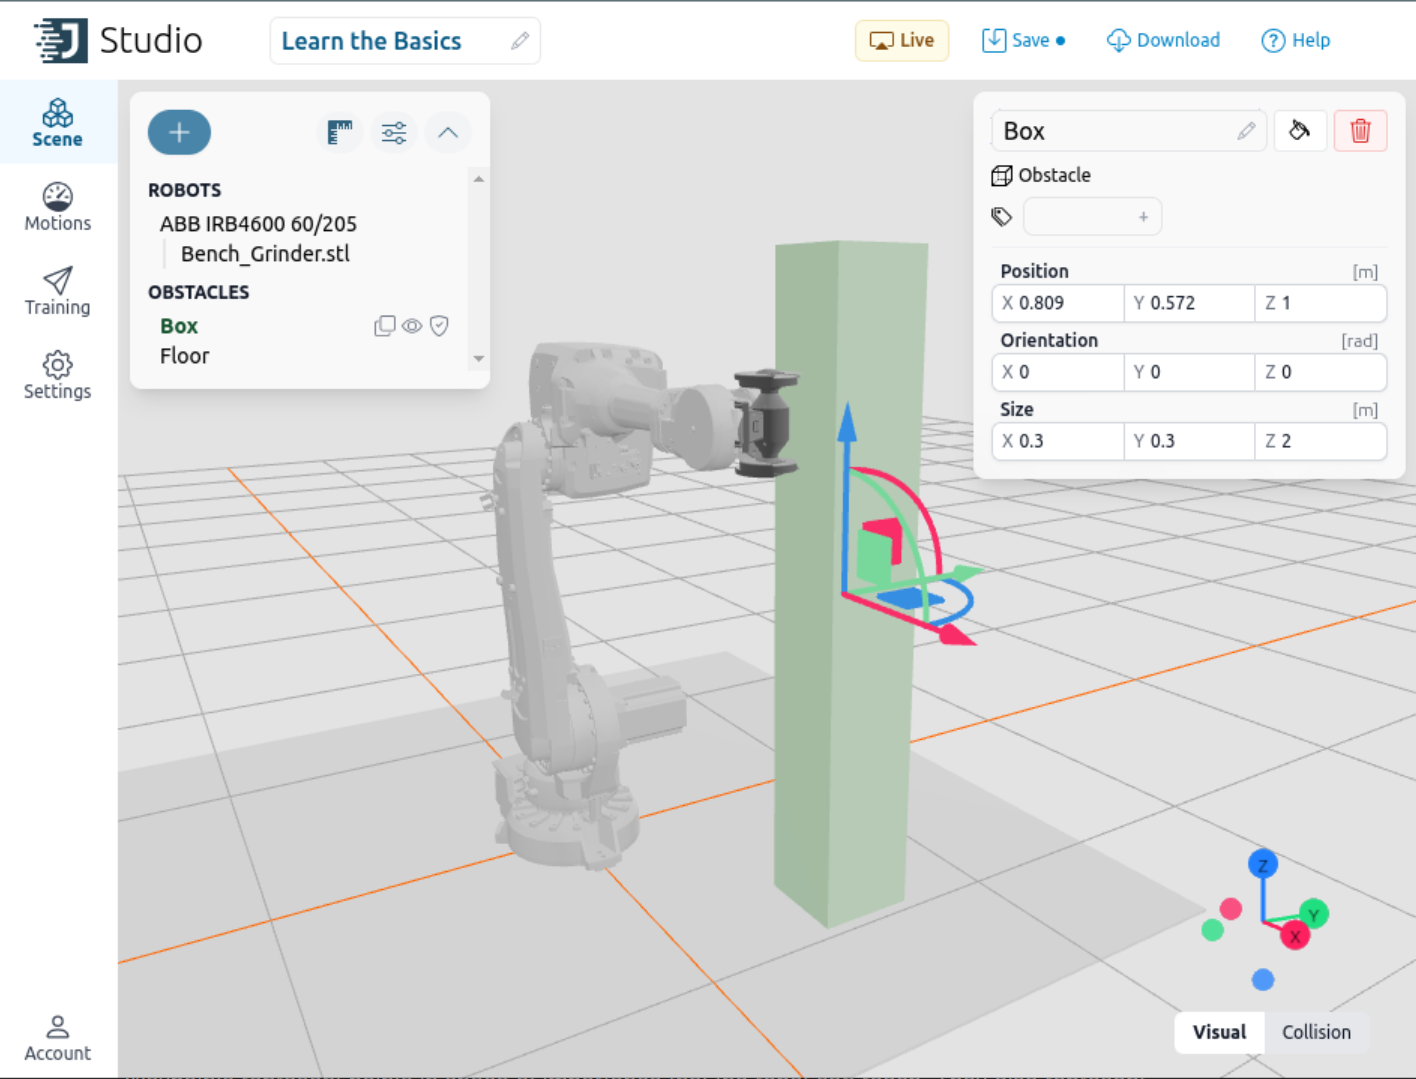
Jacobi has 3 basic shapes that can be used to model your environment. Box, Cylinder, and Sphere obstacles. These can be used as representations of your obstacles in your environment. Once obstacles have been placed in the scene, you can edit it’s parameters in it’s details panel.
Tip
💡 If your robot is mounted on the floor, don’t forget to add a floor into your environment so that your robot can plan collision free around it.
You can also upload your own custom obstacles to the world. This will allow you to build more complex and accurate application environments using your own models. Jacobi currently supports the following 3d file formats. stl obj glb
Tip
💡 Our file upload limit is 20MB. We recommend simplifying your 3d models before uploading by removing fasteners and smaller non collision geometry related meshes from your model.
Custom Robots
The Jacobi Motion Platform is robot agnostic. So if you do not see your desired robot in our robot library, you can upload your own. To upload a custom robot click on the custom robot button at the bottom of the Robot selection screen.
We support URDF files that represent robot kinematic chains. You must give the name of the base link of your kinematic chain as well as the end link of your robot kinematic chain.
Adding Waypoints
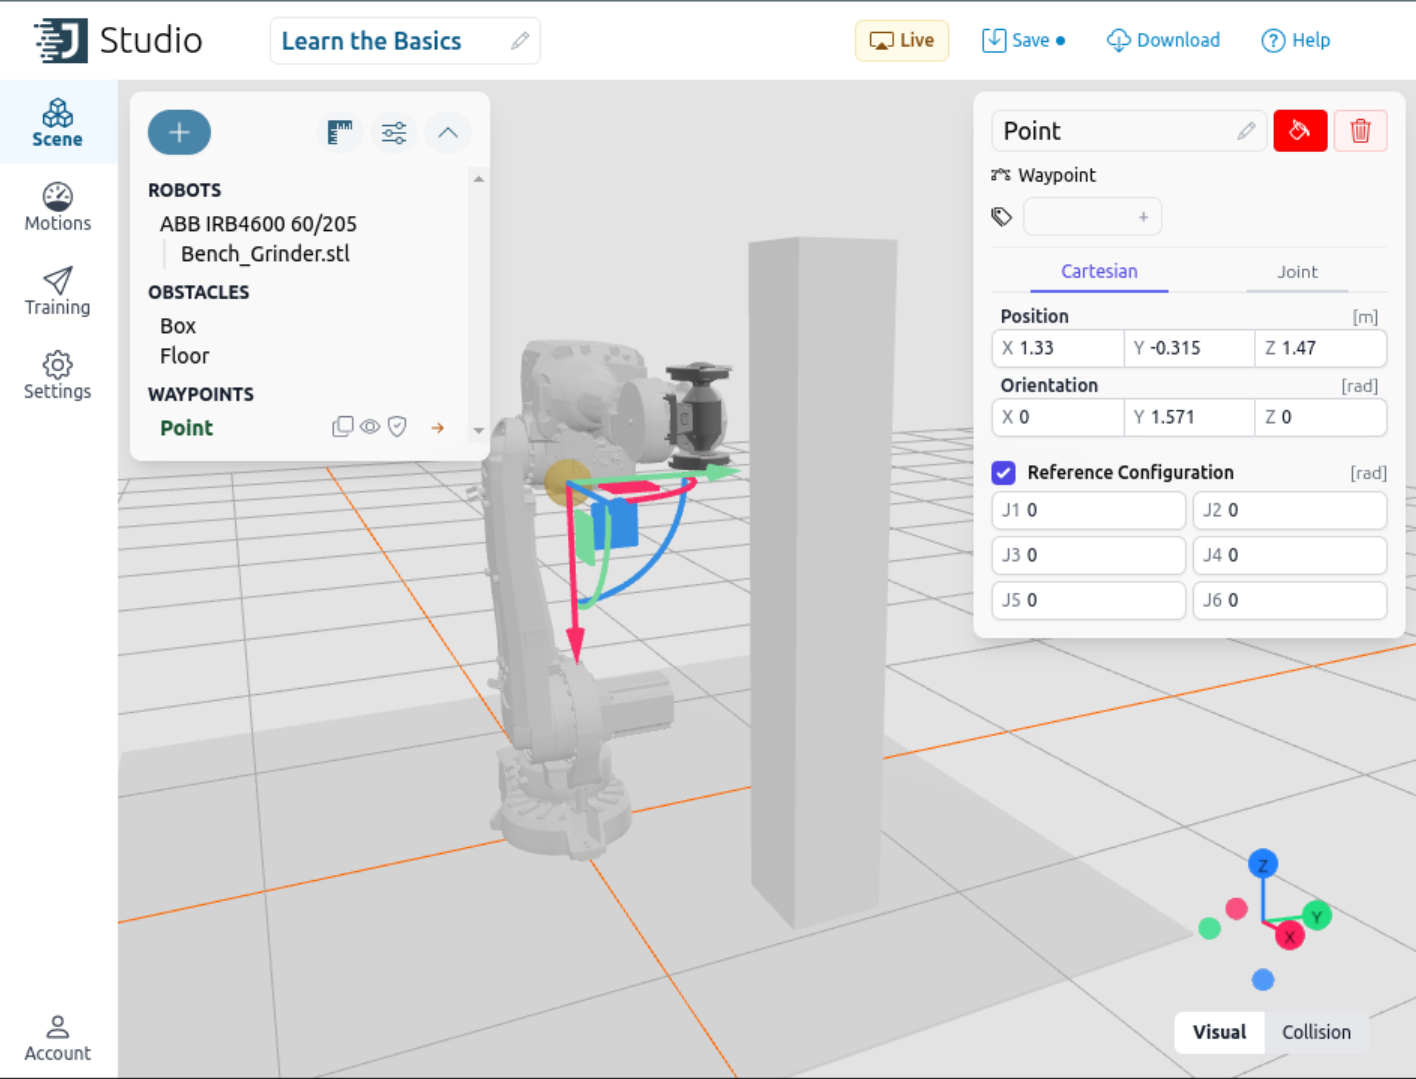
Waypoints represent points in space of importance that the robot can reach. They also represent the TCP orientation and expected robot joint position at these locations. When you set a waypoint the axis that appears on the waypoint represents the orientation that your TCP will be at that waypoint. You can also use the Waypoint Details panel in order to adjust your desired position and orientation of this waypoint. You can also use the Joint tab in the details panel to adjust the desired joint position at this waypoint.
Tip
💡 Don’t forget to check ‘set reference config’ in the waypoint details to ensure that a reference configuration is set for the waypoint. You will need the reference configuration later to deterministically plan to the point, should you need to be deteriministic.
Tip
💡 Make sure that your waypoint is within the reach of the robot! In order to do this, use the Jump To Button in the robot details panel. Or click on the arrow by the waypoint in the object tree.
Generating Test Motions
Once you have waypoints set, you can switch to the motions tab. Using the motions tab you will be able to visualize the trajectories that our motion library will generate to help move your robot.
Use the + motion button in order to add a motion into your project. You can pick a starting and an ending waypoint for your motion. Click the play button to play the motion you just generated.

Tip
💡 Don’t forget to save before running your motion! This will make sure the planner knows what your most current environment state is.
The motion details tab also contains settings that will help you modify the motion that you are trying to visualize.
Creating Pre-Trained Motions
Tip
💡 This feature is still in beta. If you have feedback about it, or have encountered issues, please
The Jacobi Motion Platform can enable accelerated motion calculations by leveraging prior training. We are able to extend pre-computation to the entire motion planning pipeline, enabling motion calculation times of less than 1ms.
Pre-Trained Motions are particularly useful when attempting to create motion plans to waypoints and goals that we can only determine at execution time of the application.
Regions
A Region is a spatial volume that we can use to mark an area of our application. This space will be used to create pre-trained motions so that we may be able to plan to an exact start and goal position that we determine later (or at runtime).
Set a region in Studio by going to your scene, clicking the + button and selecting Add a new Region from the dropdown menu. The region’s parameters can be edited in the details panel.
Start a Training
We can start a training in the Training tab. The progress of your training can be monitored on the training page in your account. Once a training is complete, you can download the motion plan file to be used later in your code. You can also visualize some of the pre-trained motions from the training tab.
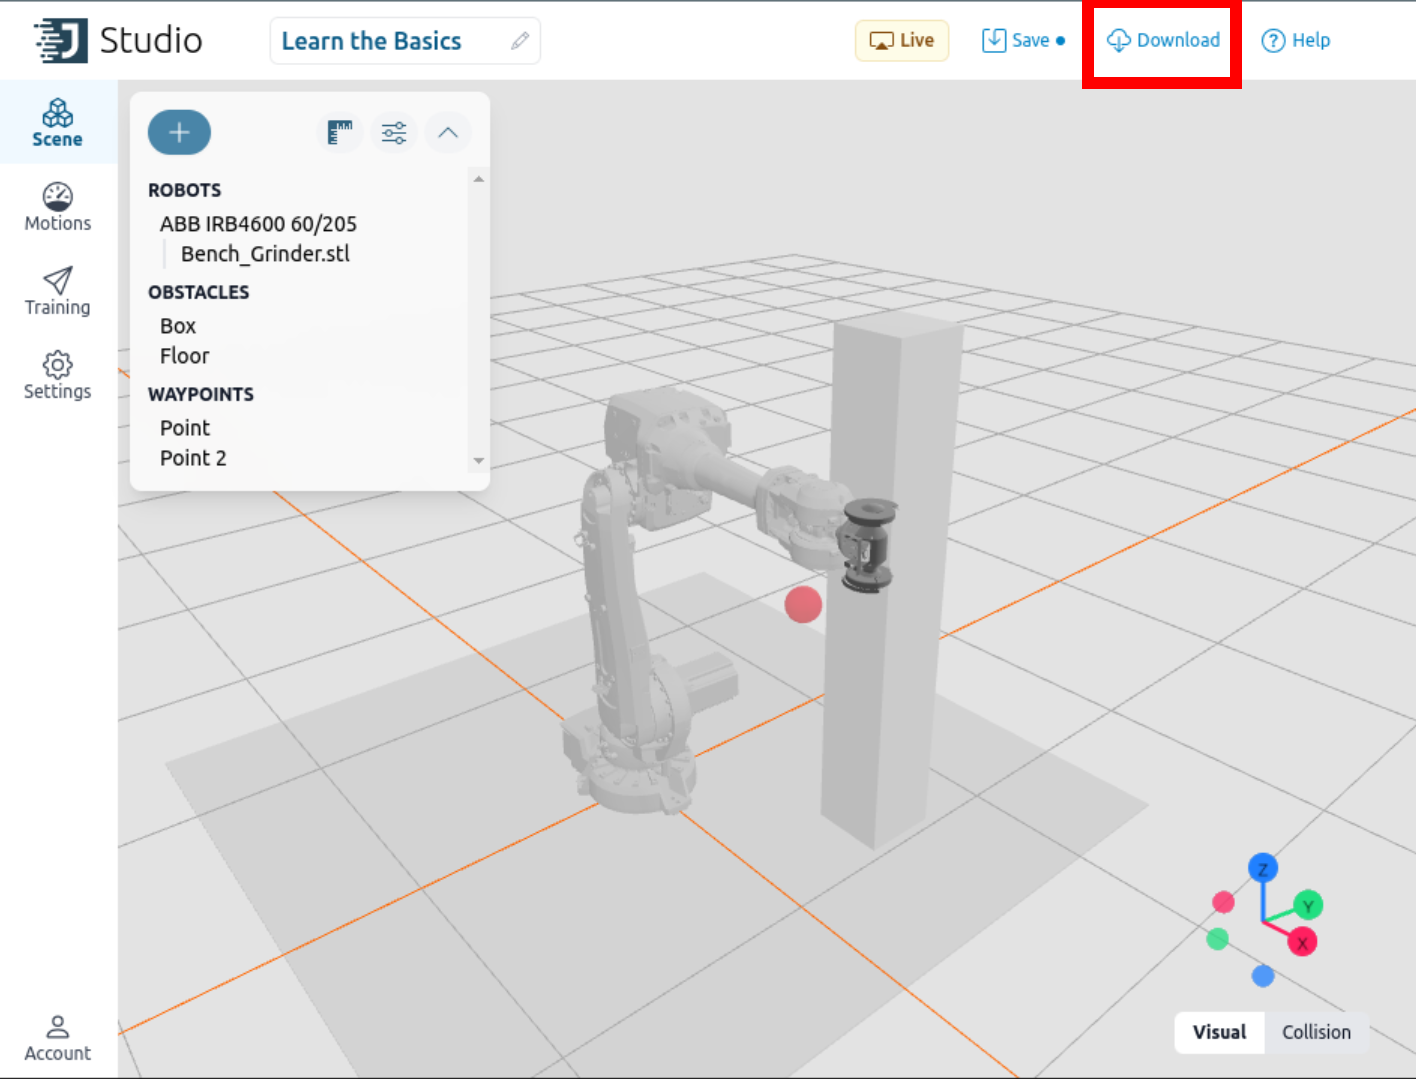
Exporting Projects
When you have completed building your environment, you can download it to use in your programming in conjunction with the Motion Library. To do so, click the download button at the top right of the 3d canvas. Studio is meant to be used in conjunction with the motion library, and will take the downloaded .jacobi-project as an input to generate collision free robot motions