Quick Start
This tutorial is designed to give you the absolute basics to getting you to your first motion plans.
The Jacobi Motion Platform consists of a suite of tools that will help you create fast, precise, and bold motions for your robot applications. In order to create good motions for your robots you must have the following:
An understanding of your environment
Where you want your robot to go
A way to validate your robot’s motions
You will be using the following tools in order to quickly generate motions for your robot applications
Studio
Jacobi Motion Library
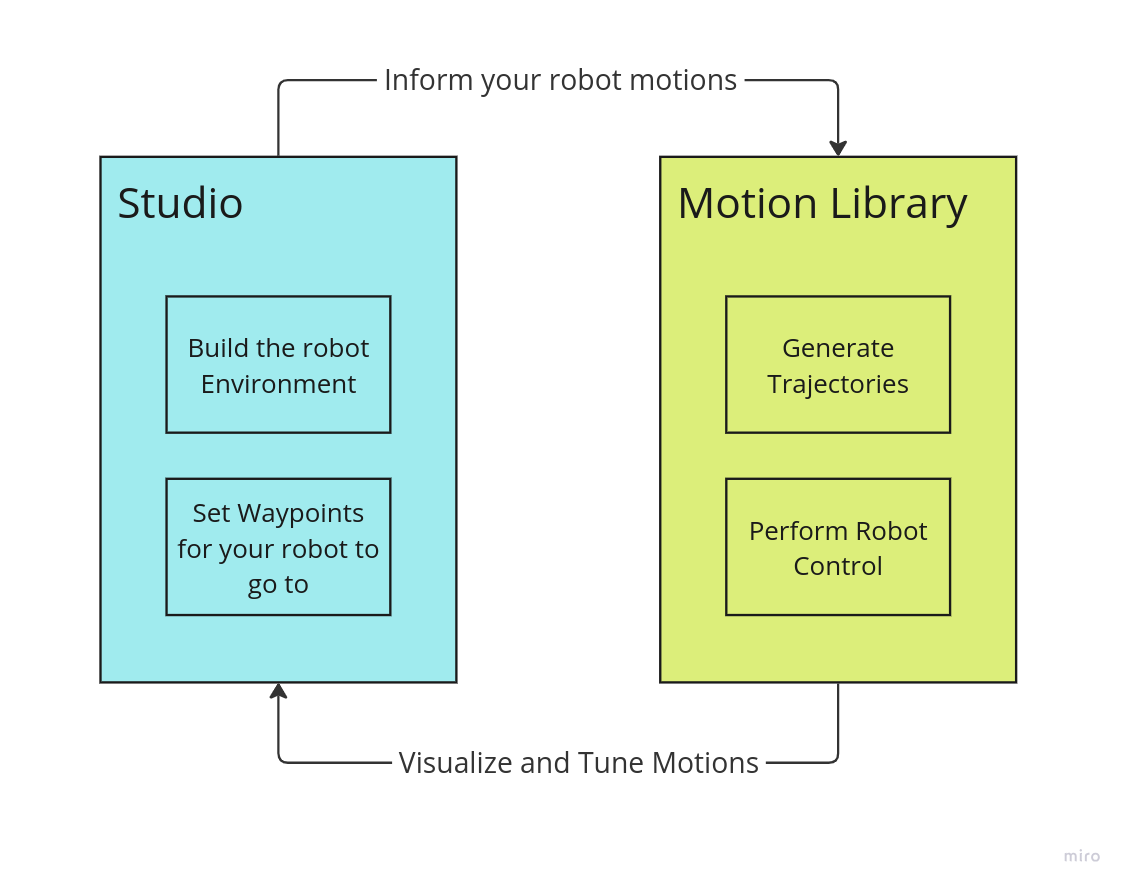
The Motion Library and Studio are two tools that go hand in hand with each other to support robot motion planning and application development. Studio is where you will set up your robot’s environment. After your environment is set up the Motion Library is what you will use to program your robot motions. As you build your robot program, Studio will allow you to visualize your robot program using Studio Live.
You can find more information about Studio, Studio Live, and our Motion Library in our Learn the Basics Guide.
At the end of this quick start guide, you will have created a robot application project can move around obstacles.
Setting your Environment
The first step to getting a robot moving is making sure that it’s environment is defined. Jacobi’s Motion Platform achieves this through Studio.
In Studio open a new project and place a robot into the scene by clicking the + button.
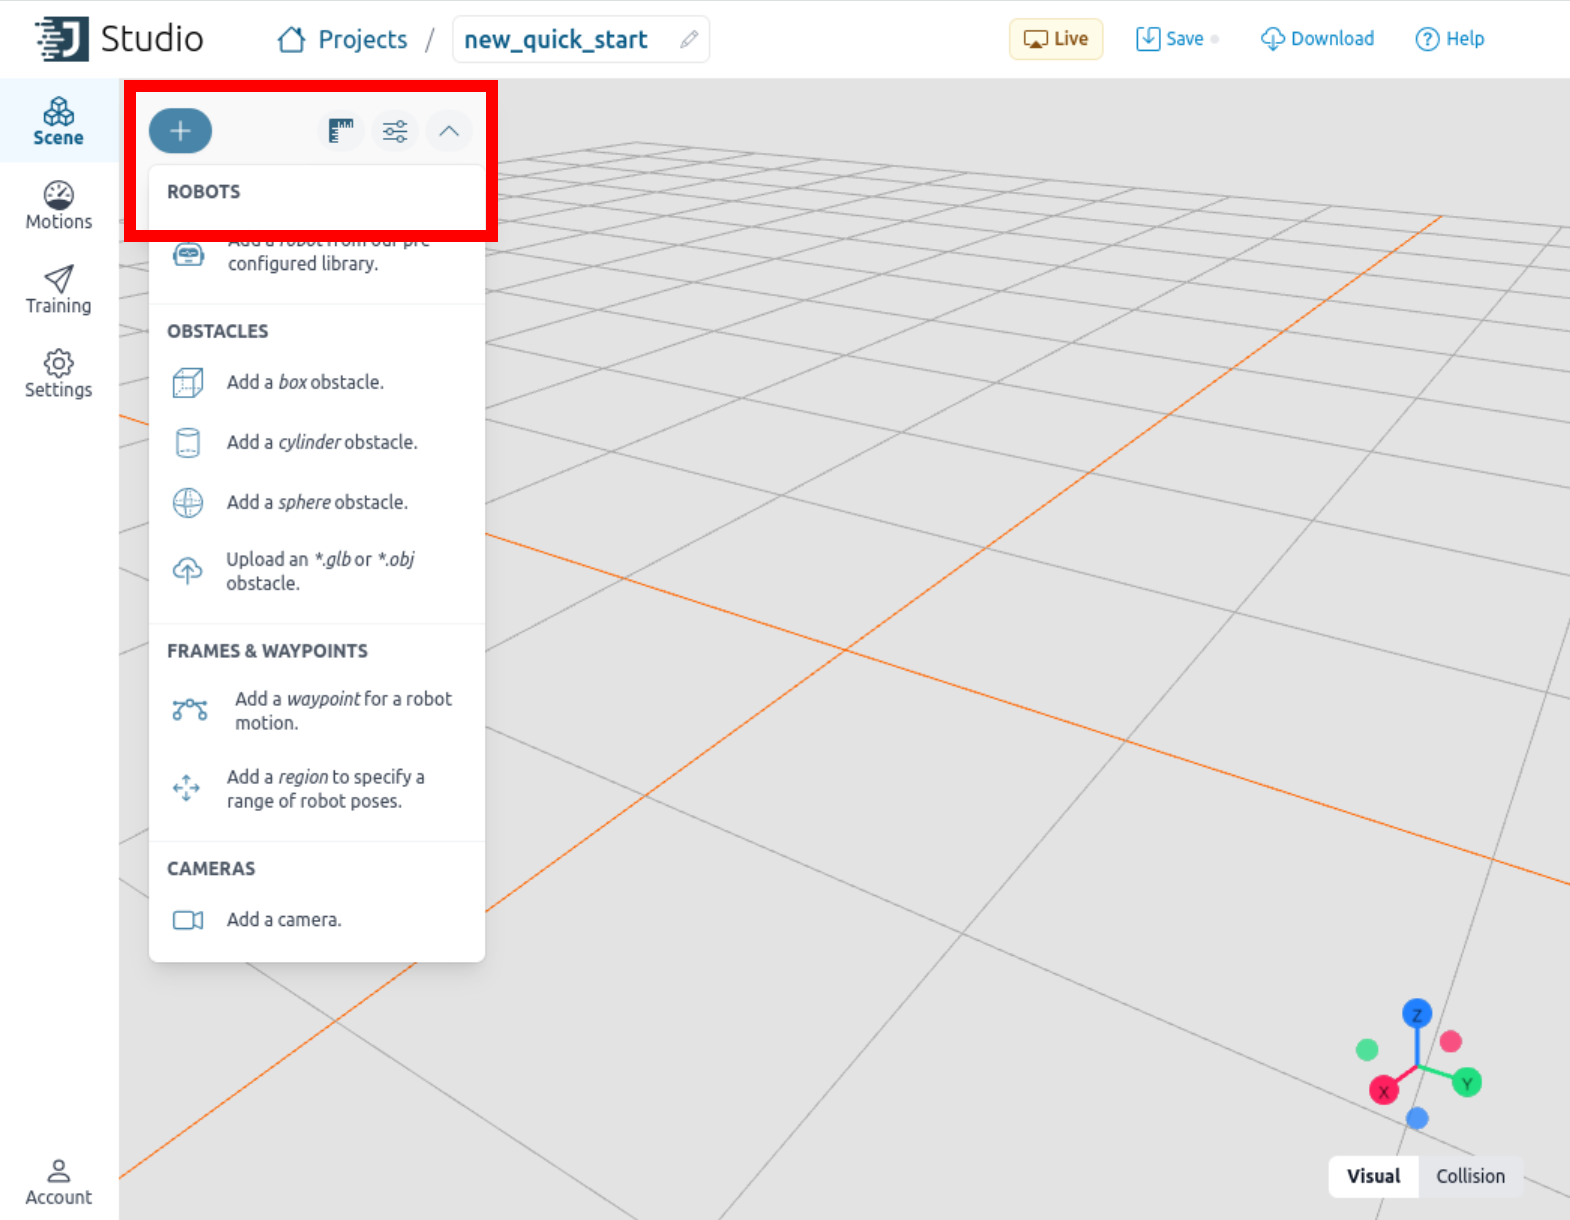
The Jacobi Motion Platform is hardware agnostic and supports various robots from all major robot OEMs. For this tutorial you may pick any robot. Pick a robot to place onto the studio canvas:
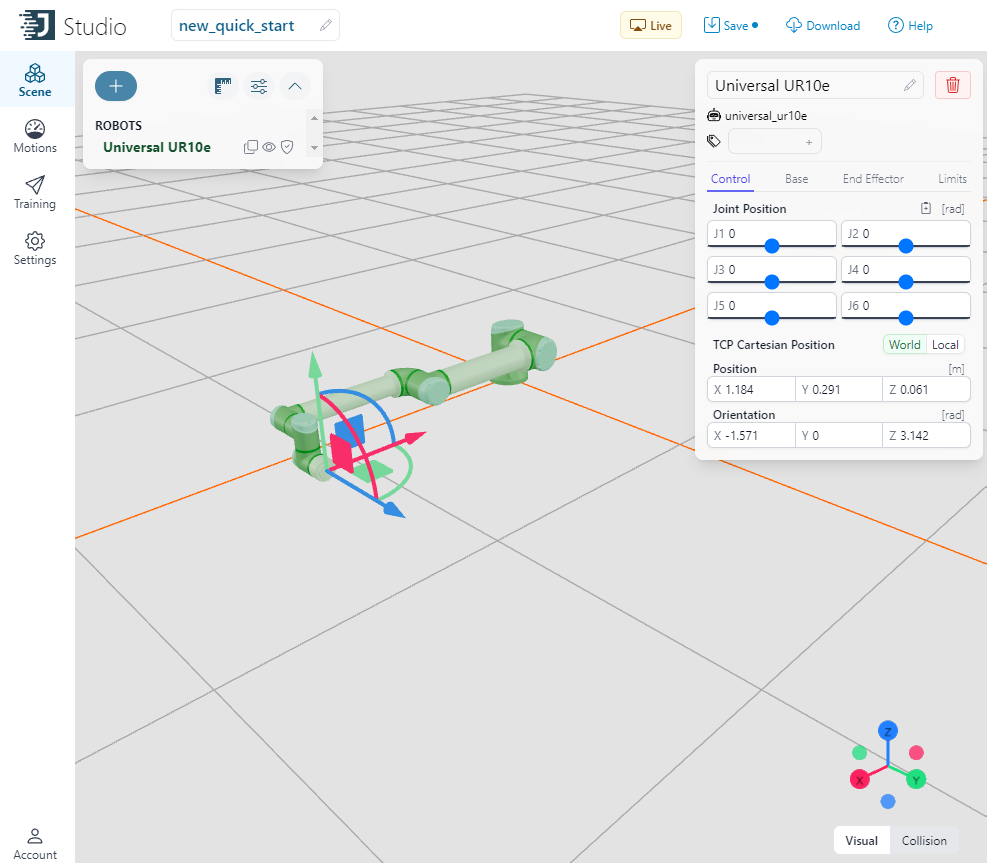
Tip
You can adjust the robot’s parameters with the details panel to the right of the canvas
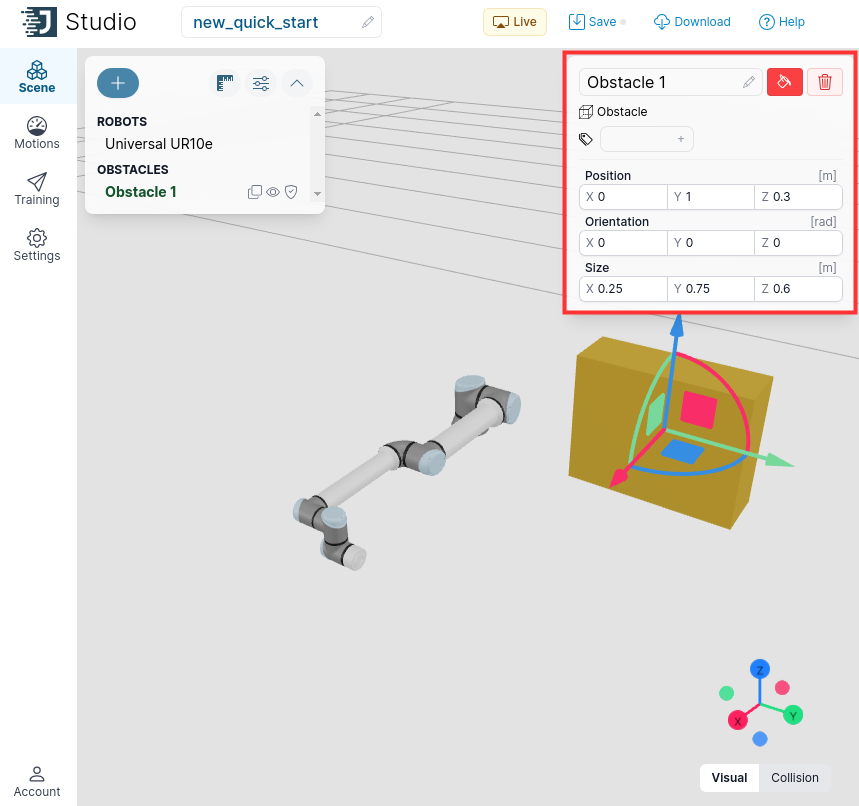
Place an obstacle into the scene by clicking the + button. While this can be any obstacle of any type, for this quick start guide we recommend a box obstacle with the following settings:
Tip
You can optionally set the color of the obstacle using the “Fill Bucket” Icon
Add a floor to mount the robot and the obstacle using the same Box Obstacle with the following configuration:
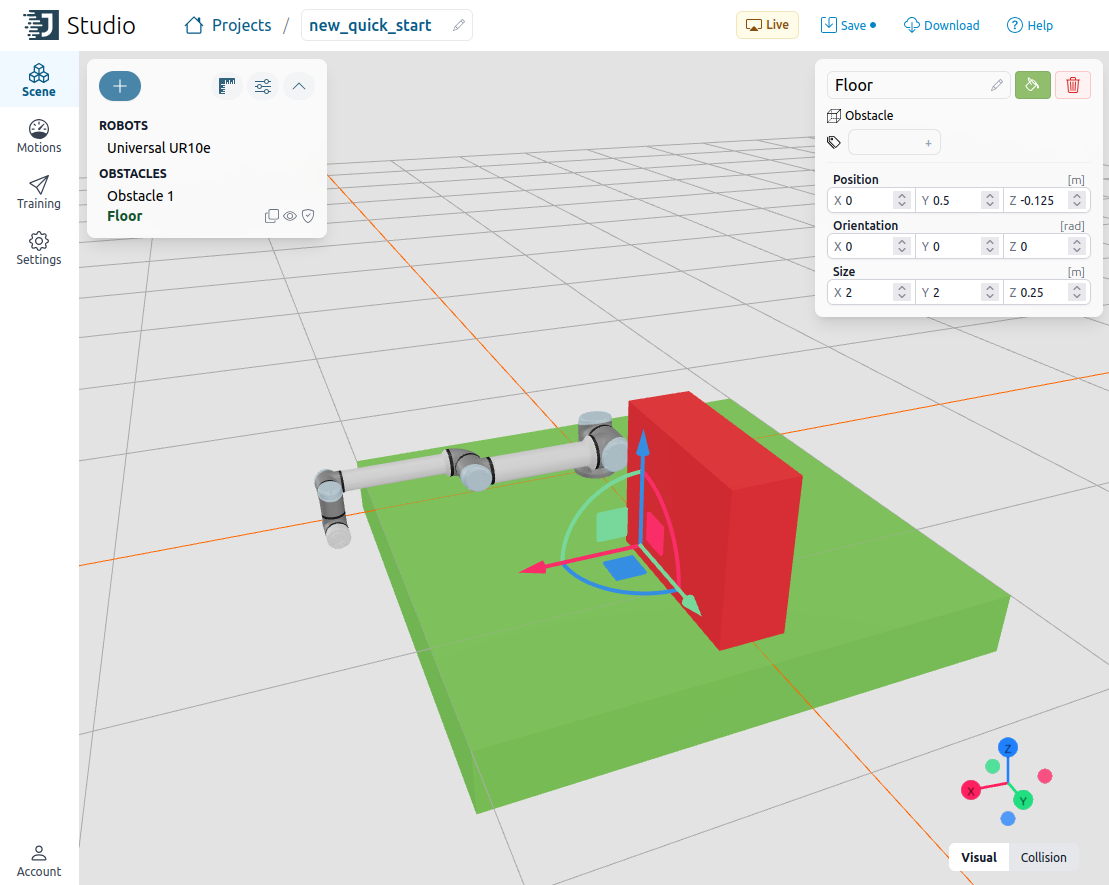
Tip
You can adjust the Obstacles parameters with the details panel to the right of the canvas
Setting Waypoints
Once you have your environment set, you are ready to set waypoints to generate motions for your robot.
Click on the + button to add a waypoint to the scene, use the waypoint’s axis in order to place it in your desired position.
Tip
The axis presented for the waypoint represents the orientation that the robot’s TCP will be in at that specific waypoint
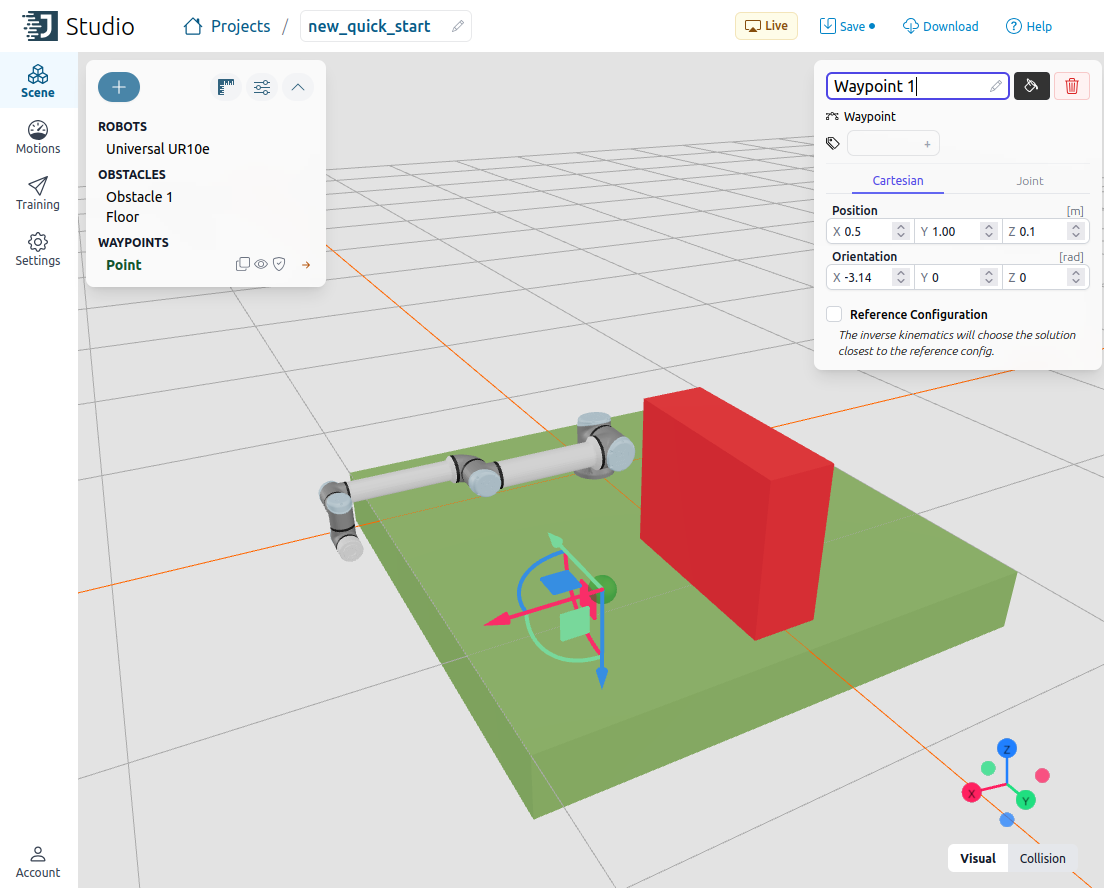
Tip
You can adjust the waypoint’s parameters with the details panel to the right of the canvas
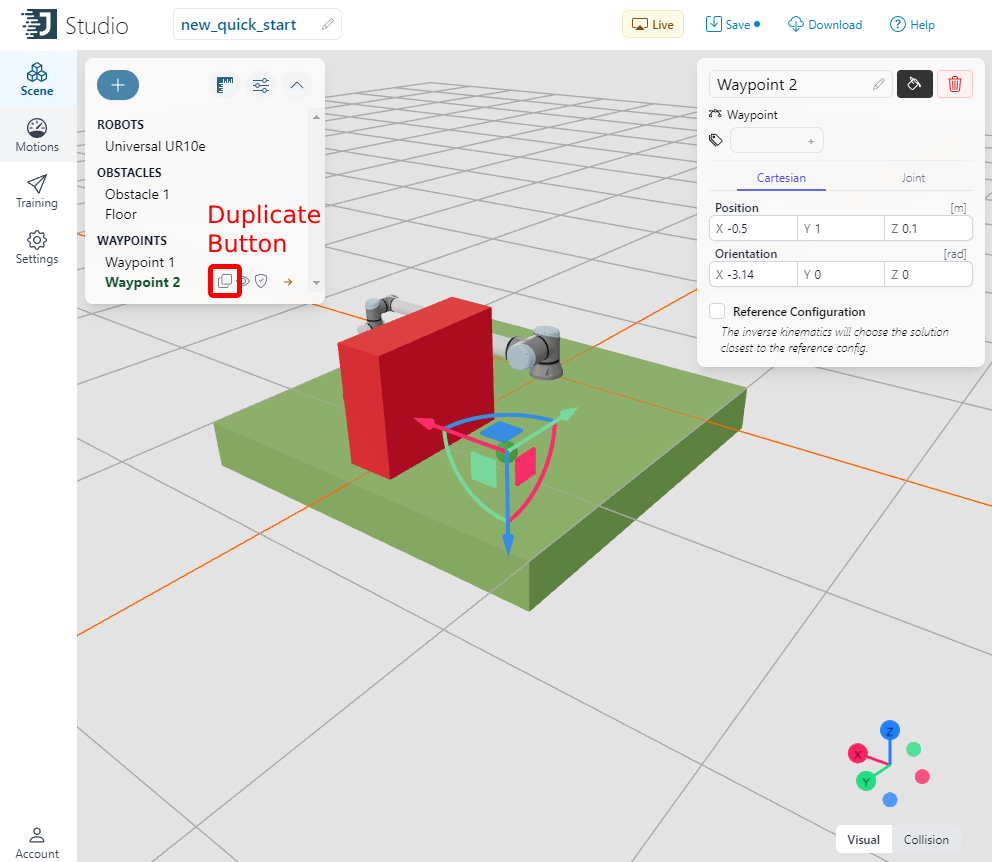
Create a second waypoint in your scene using the + button. You may also use the duplicate button found in your object tree to create a duplicate waypoint. Place the waypoint in your desired position such that moving between the two waypoints would require the robot to avoid your obstacle
Validating Motions
Once you have your waypoints set, you are ready to validate the robot’s motion between waypoints.
Click on the motions button in the side bar on the left of the canvas. This will take you to the motions tab where you will be able to use the waypoints you just created to generate motions for your robot.
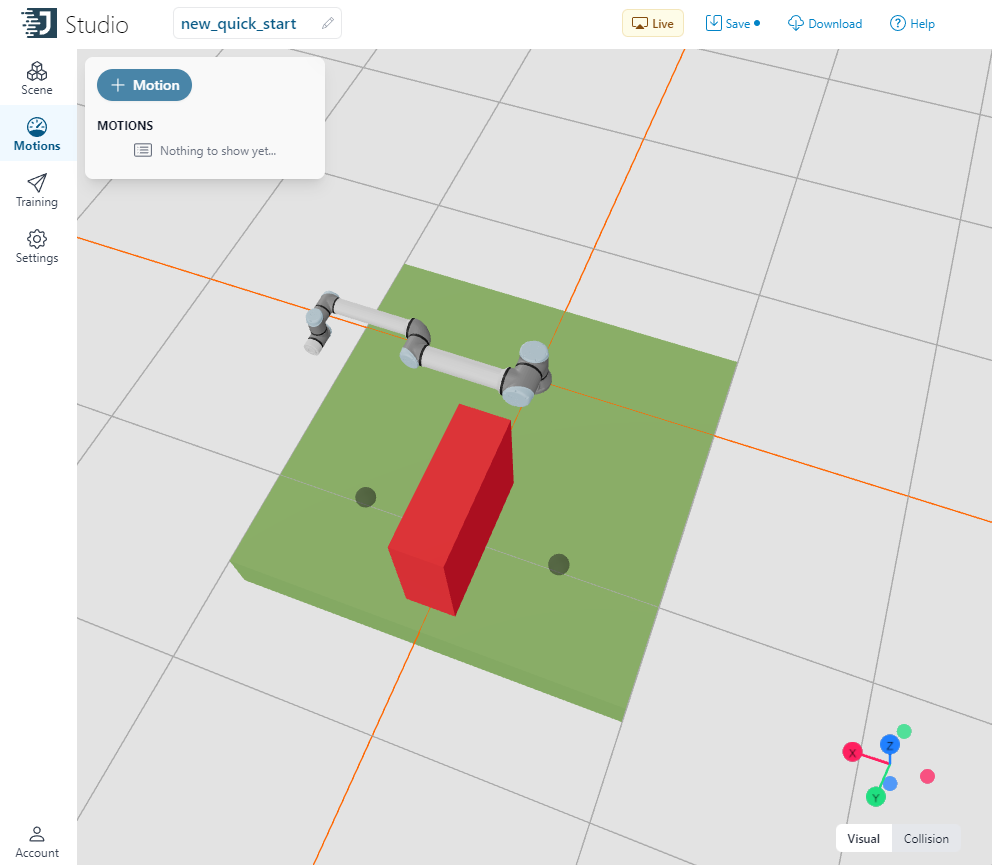
Click on the + button in order to add a motion to your project. You can use the motion details panel to set your motions starting and ending waypoints. Once you are ready, save your project and click the play button. If a motion exists between your two waypoints then you will see the robot move between them.
Tip
Don’t forget to hit save before creating motions! If you are getting an error while trying to generate motions where you think motions should exist, try hitting save first!
Downloading a Project & Using the Motion Library
Setup
Once your project is set up to your liking, you can download the project and use it in your code in order to control your robot. Click the Download button to download your project.
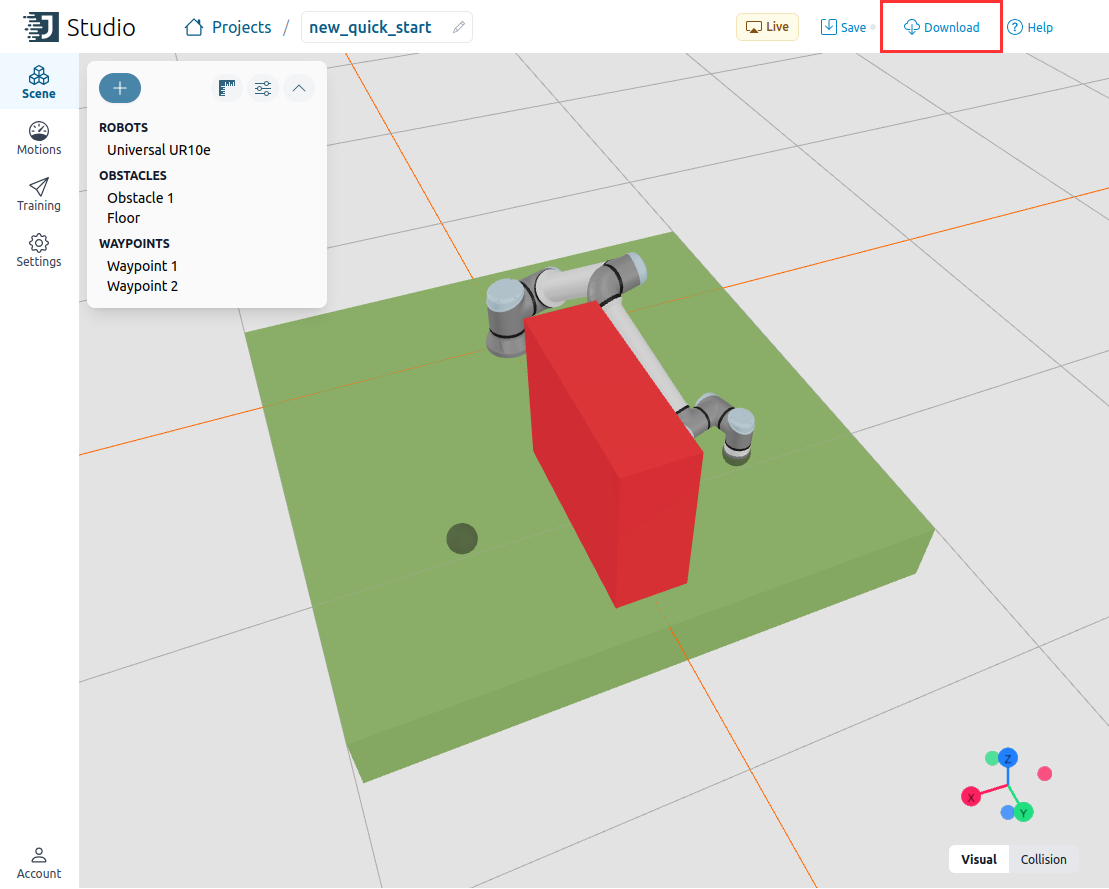
Tip
The .jacobi-project file type contains all the basic information that the motion library will need in order to quickly generate fast, bold, and precise motion plans for your robot.
The Jacobi Motion Library exists in both C++ and Python. For the rest of this tutorial, please pick your appropriate language for the code examples below.
The basic structure for a robot program using the Jacobi Motion Libraries is as follows:
from jacobi import Environment, Planner, Box, Frame, Studio, Obstacle
from jacobi.robots import*

planner = Planner.load_from_project_file('MyProject.jacobi-project')
robot = planner.environment.get_robot()

studio = Studio()
#include <jacobi/planner.hpp>
#include <jacobi/robots/universal_ur10e.hpp>
#include <jacobi/studio/studio.hpp>

using namespace jacobi;

int main() {

Studio studio;

auto planner = Planner::load_from_project_file("../new_quick_start.jacobi-project");
auto robot = planner->environment->get_robot();
}
In order to properly plan motions for your robot, you need to instantiate a Planner object. The Planner is the core of the Jacobi library and calculates the actual collision free trajectories that the robot will move on.
Find out more info on the Planner class
Since in this example we have instantiated a Planner using an existing .jacobiproject file, the object already has an environment and a robot inside of it and will not need them to be created separately. However we recommend creating pointers to them for future reference.
The Studio class is used to communicate with Studio Live. This will allow you to leverage Studio as a visualization tool for your project as you build it.
Planning & Visualizing Motions
Now that you have the basics set up in your code, you are now ready to execute motions through your code, and see them visualized in Studio Live.
Make sure that Studio Live is activated appropriately. You can do so by clicking on the settings and then checking Enable live data inside Studio
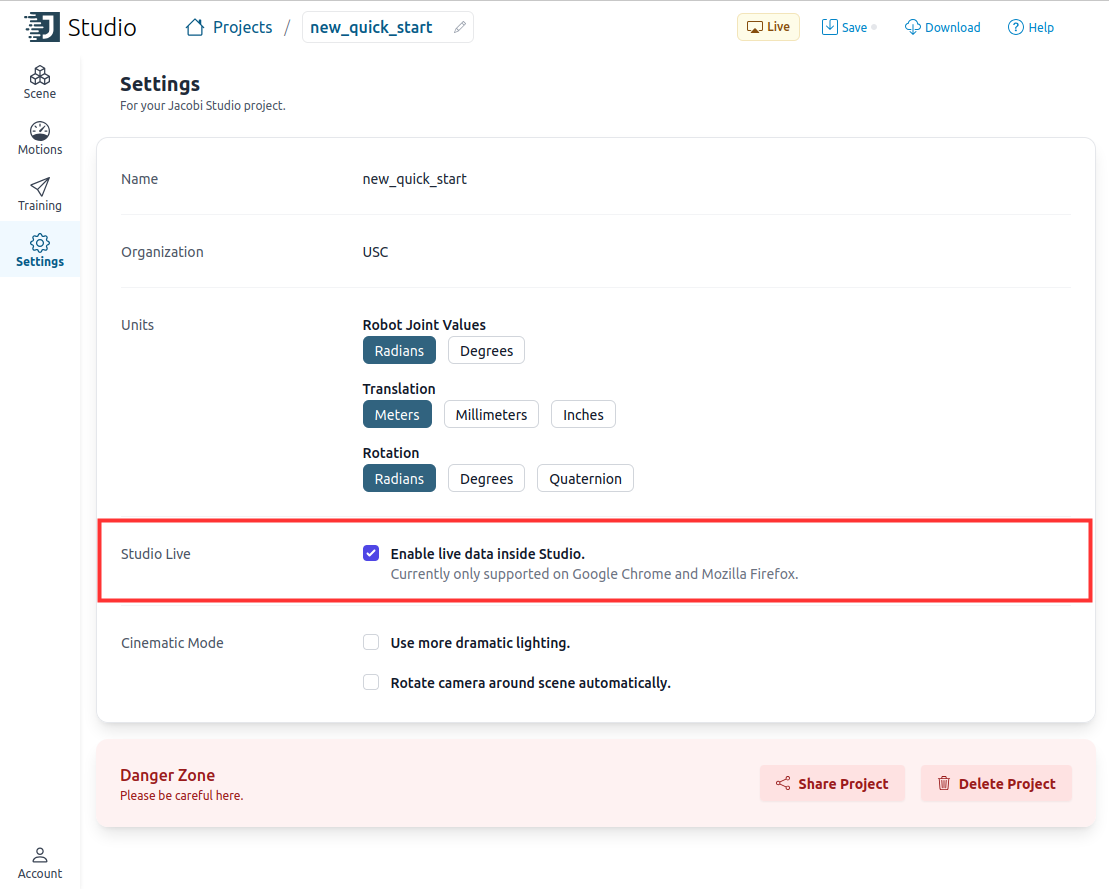
Tip
While you do not need studio to plan motions programmatically, using Studio Live to visualize your motions will help you validate your work
Once you have Studio Live turned on, you are ready to visualize your motions through code.
Extract the waypoints that you created in studio from the planner object. You will then use these waypoints to create motion plans for using the plan() function.
Now you have motions that can be used to run on real robots and in visualization using Studio Live. The Studio() class has a host of functions that will aid in the visualization of your robot motions and application. In order to visualize your motions just use the run_trajectory() function.
Point1 = planner.environment.get_waypoint('Waypoint 1')
Point2 = planner.environment.get_waypoint('Waypoint 2')

Motion1 = planner.plan(Point1, Point2)
Motion2 = planner.plan(Point2, Point1)

studio.run_trajectory(Motion1)
studio.run_trajectory(Motion2)
auto waypoint1 = planner->environment->get_waypoint("Waypoint 1");
auto waypoint2 = planner->environment->get_waypoint("Waypoint 2");

auto motion1 = planner->plan(waypoint1, waypoint2);
auto motion2 = planner->plan(waypoint2, waypoint1);

studio.run_trajectory(motion1);
studio.run_trajectory(motion2);
The following is the full code used in this tutorial project, and an example execution of the code in Studio Live.
from jacobi import Environment, Planner, Box, Frame, Studio, Obstacle
from jacobi.robots import*

planner = Planner.load_from_project_file('MyProject.jacobi-project')
robot = planner.environment.get_robot()

studio = Studio()

Point1 = planner.environment.get_waypoint('Waypoint 1')
Point2 = planner.environment.get_waypoint('Waypoint 2')

Motion1 = planner.plan(Point1, Point2)
Motion2 = planner.plan(Point2, Point1)

studio.run_trajectory(Motion1)
studio.run_trajectory(Motion2)
#include <jacobi/planner.hpp>
#include <jacobi/robots/universal_ur10e.hpp>
#include <jacobi/studio/studio.hpp>

using namespace jacobi;

int main() {

    Studio studio;

    auto planner = Planner::load_from_project_file("../new_quick_start.jacobi-project");
    auto robot = planner->environment->get_robot();

    auto waypoint1 = planner->environment->get_waypoint("Waypoint 1");
    auto waypoint2 = planner->environment->get_waypoint("Waypoint 2");

    auto motion1 = planner->plan(waypoint1, waypoint2);
    auto motion2 = planner->plan(waypoint2, waypoint1);

    studio.run_trajectory(motion1);
    studio.run_trajectory(motion2);

}