Part 4: Using the Palletizer Dashboard
The Dashboard page is the central hub for monitoring and controlling the palletizing application. It provides a real-time visualization of the boxes on each pallet, controls for managing the palletizing operation, and performance metrics for monitoring and assessing the quality of the palletizing.
Head to the Dashboard page by clicking on its icon in the left sidebar menu.
Get Started
A quick way to get started with the Palletizer Dashboard is by running the application using the simulated robot driver and controller. Detailed explanations of the Dashboard components are provided in the following section.
Go to the Settings page (on the left sidebar menu) and click on the Hardware Settings at the bottom-right (see more info on those here).
In the Robot Driver configuration select Simulated.
In the Controller configuration select Simulated.
Go to the Setup page and make sure the correct setup is activated. The activated setup has a filled-in star icon.
Go to the Dashboard page.
Press and hold the Go to Home button to simulate the robot moving to its home position before palletizing. When the robot successfully makes it home, you should see a blue checkmark above “Go to Home” and the “Start Palletizing” button turn green.
Click on Start Palletizing.
Observe the boxes appearing on the active pallet and the different motions being executed in the Current Motion section beneath the pallet visualizations.
Click on Pause and observe how the operation stops promptly. Click on Continue Palletizing.
Click on Stop and observe how the operation stops after the current box is palletized. Click on Start Palletizing.
Click on Stop after Pallet and observe how the operation stops after all boxes in the active pallet are palletized.
Click on Clear Pallet to clear the completed pallet.
Experiment with the box and layer navigation buttons to set an arbitrary number of boxes on the active pallet. This is useful if you end up manually adding or removing some boxes during palletization.
Click on Start Palletizing and observe how subsequent boxes are palletized.
The following GIF demonstrates steps 5 and below:
Using Real Hardware
Using real hardware with the Palletizer Dashboard is almost as straightforward as using the simulation. The only difference is inputting the appropriate drivers, controllers, and signals in the hardware and signal settings.
Once configured, all steps for starting, pausing, and managing palletizing operations remain the same. This seamless transition ensures a consistent user experience, whether in simulation or with real hardware.
For hardware requirements, refer to this page.
Components
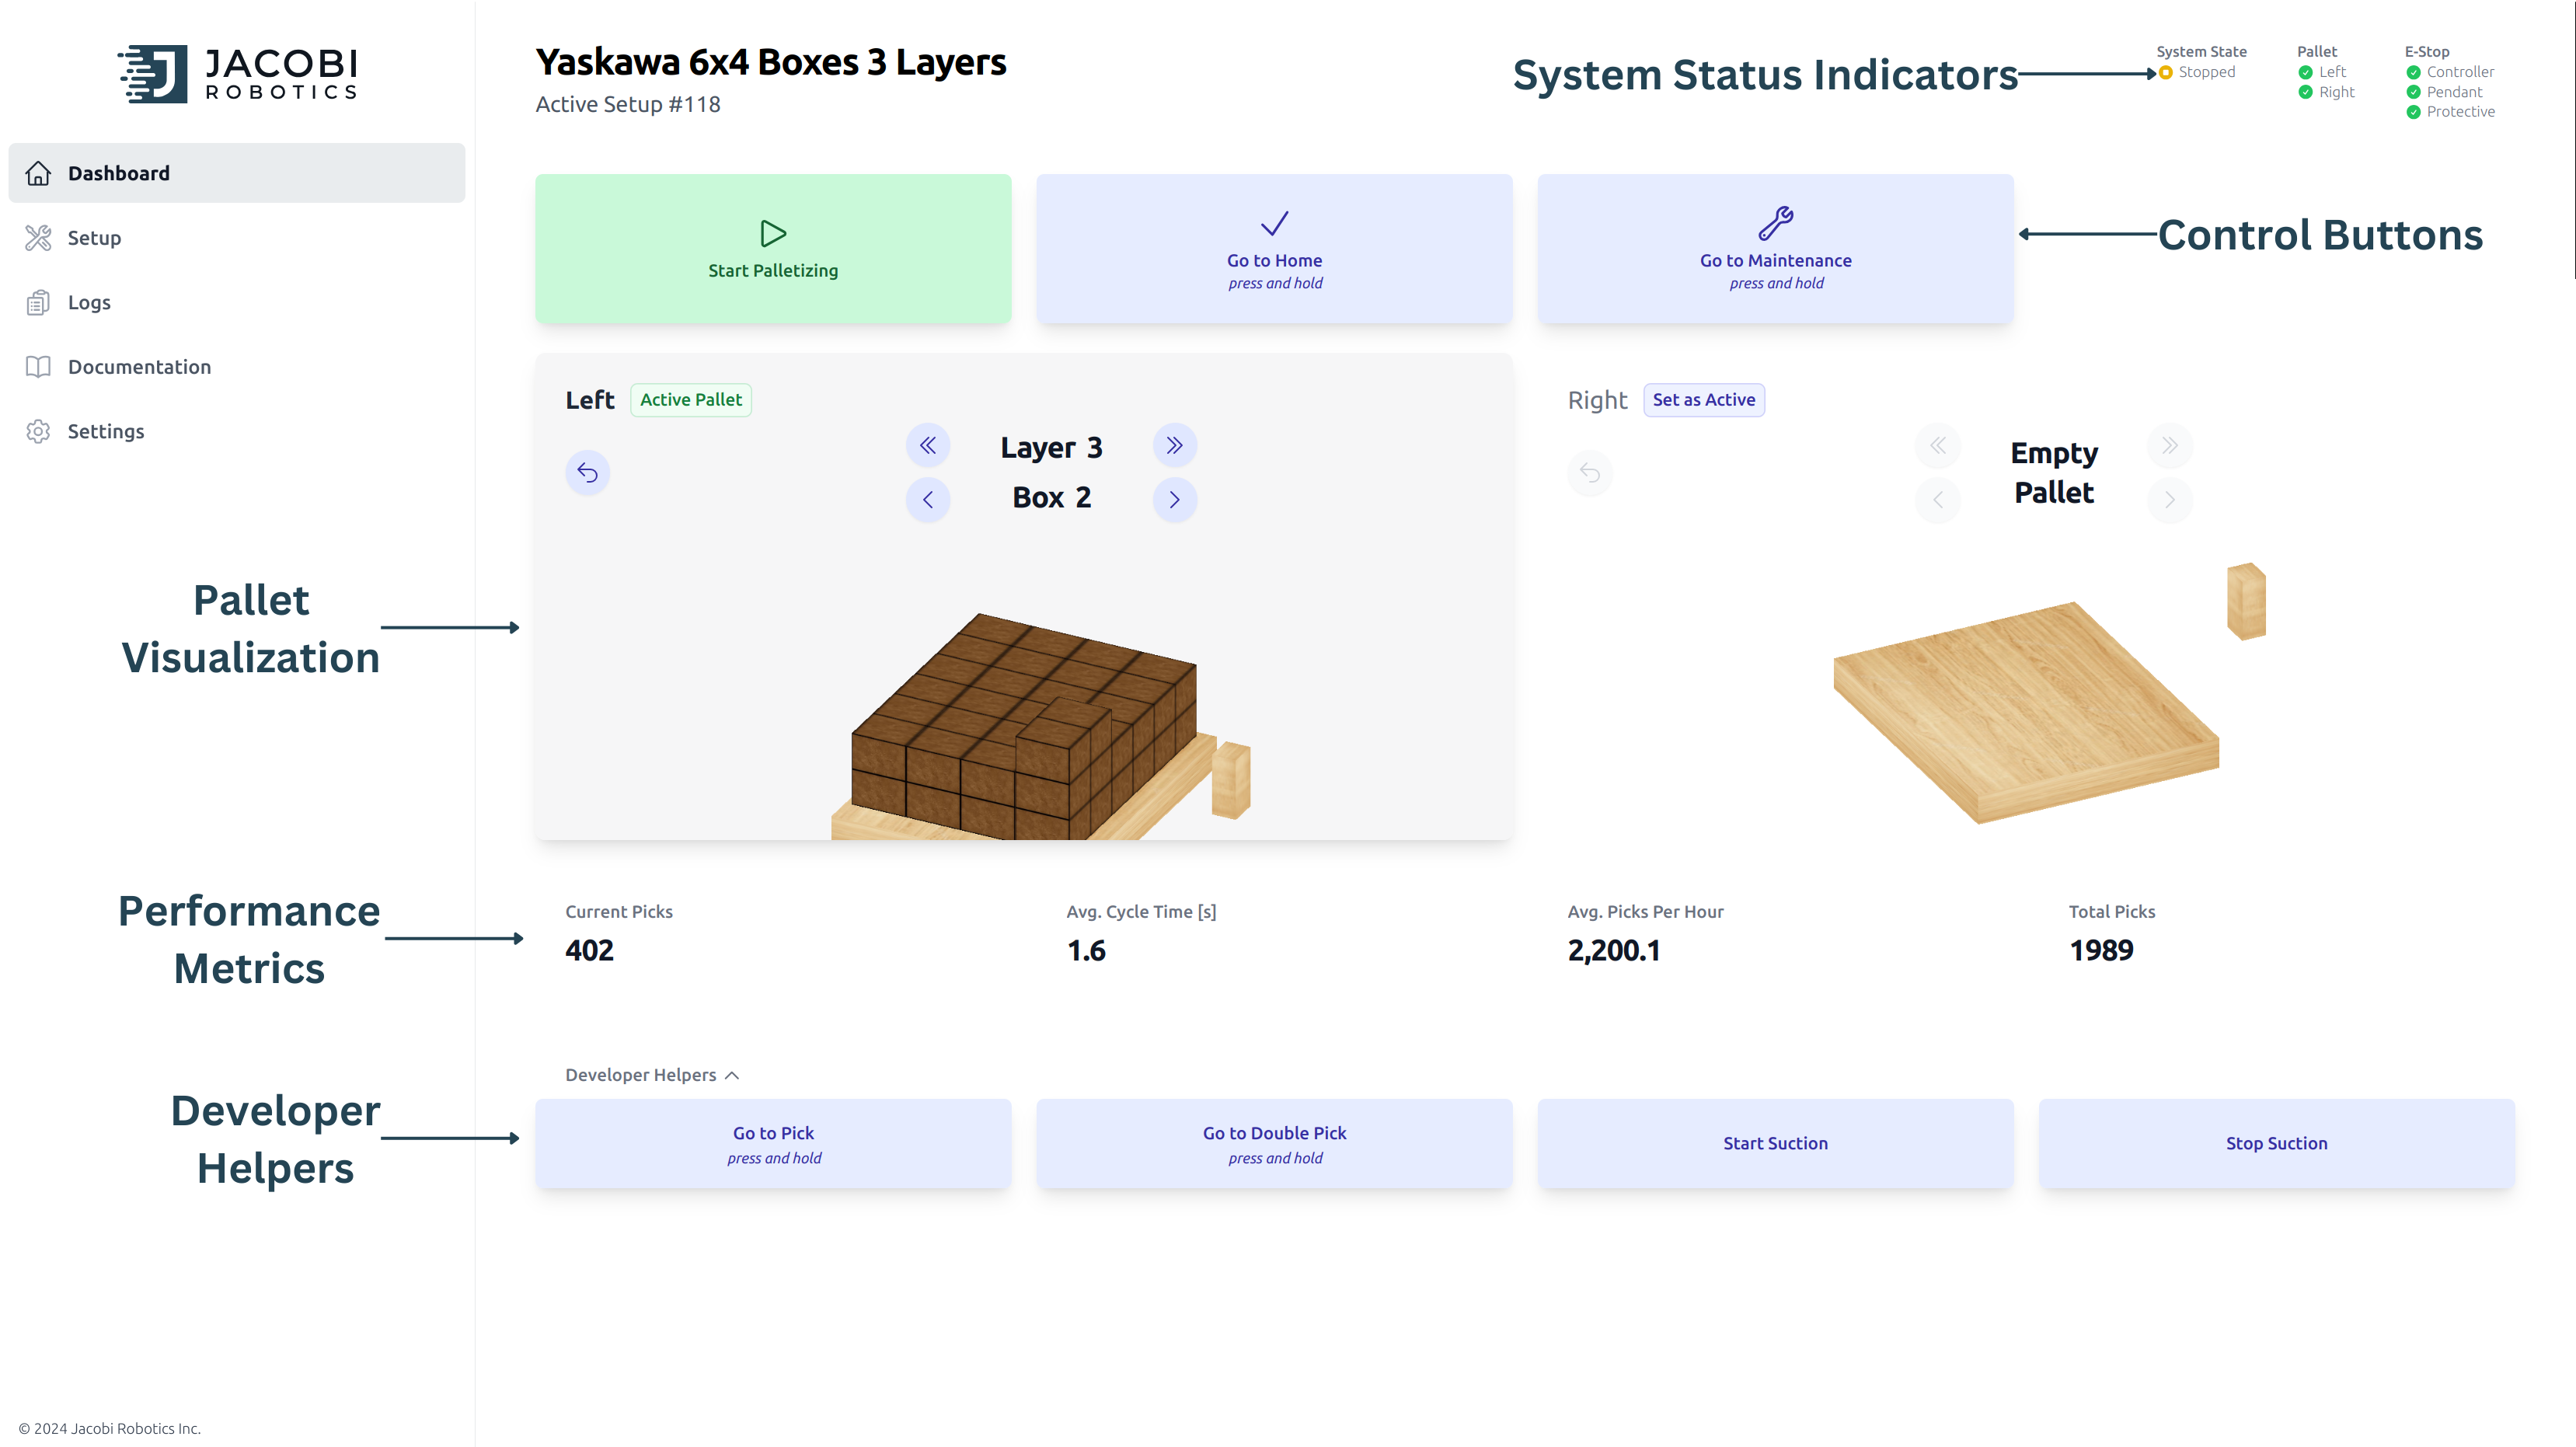
Pallet Visualizations
The pallet visualizations indicate their current state, such as being empty or active with boxes. Above them are details about the current layer and the number of boxes placed on that layer. The “Active Pallet” pop-up indicates the pallet that is currently being palletized.
The interface allows you to easily set different layers and boxes using the provided buttons.
Layer Navigation: The double arrow buttons (
<<and>>) allow you to switch between different layers.Box Navigation: The single arrow buttons (
<and>) let you choose boxes within the currently selected layer.Back Arrow: The curved arrow button resets the pallet, returning it to its initial state.
Note
When double picking, if a single box of a double pick is set, the robot will palletize the single box first before continuing with double picks.
System Status Indicators
The system status indicators at the top-right corner of the page provide real-time updates on the palletizing system’s operational status.
The System State shows whether the system is currently running or stopped.
The Pallet indicates the condition of the left and right pallets, with green check marks for normal operation and yellow exclamation marks for issues requiring attention.
The E-Stop displays the safety status of the controller, pendant, and protective measures, using green check marks to confirm that all emergency stop components are safe and not engaged.
Performance Metrics
Real-time performance metrics below the pallet visualization allow you to monitor the palletizing operation for efficiency.
Current Picks: The number of picks performed for the current setup.
Avg. Cycle Time [s]: The average time taken for each cycle.
Avg. Picks Per Hour: The average picks for hour determines the efficiency for the current setup.
Total Picks: The total number of picks completed for all setups.
Developer Helpers
Developer helpers near the bottom of the page allow for some manual control operations that assist developers in testing and troubleshooting the system. The following options are available:
Go to Pick: Moves the robot to the pick position.
Go to Double Pick: Moves the robot to the double pick position.
Start Suction: Activates the suction mechanism.
Stop Suction: Deactivates the suction mechanism. This can be used to release boxes during troubleshooting.
Restart Runner: Restarts the Palletizer runner.